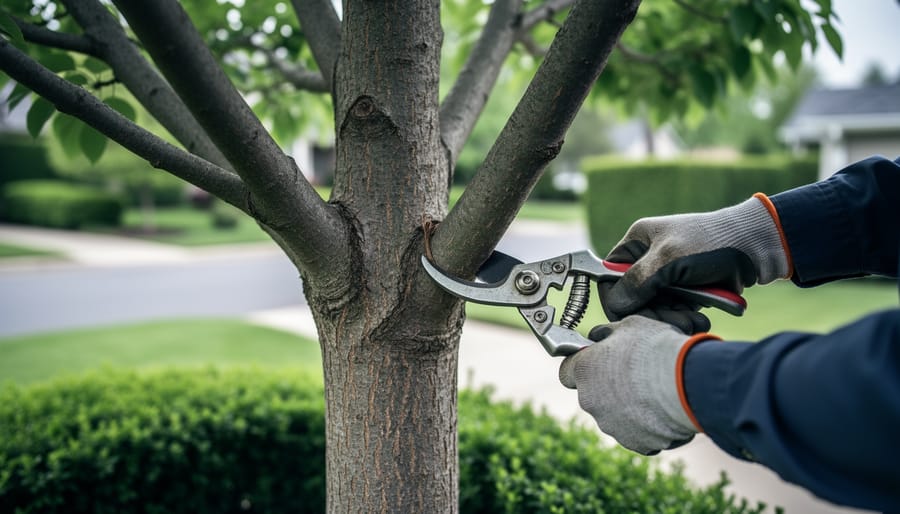
Pruning your trees correctly means using one of four essential cut types: thinning cuts, heading cuts, reduction cuts, and cleaning cuts. Each technique serves a distinct purpose in tree health and structure, from removing dead wood to shaping growth and improving light penetration. Understanding when and how to use each cut makes the difference between a thriving tree and one that struggles with disease, weak limbs, or poor form.
Here at our family-owned business, we’ve spent over 21 years helping Edmonton homeowners understand that pruning isn’t just about making trees look tidy. The right cut in the right place supports natural healing, directs energy where the tree needs it most, and builds strong branch architecture that withstands our prairie winters. The wrong cut can leave wounds that invite decay, stimulate unwanted water sprouts, or weaken the tree’s defenses against pests and disease.
Whether you’re shaping a young ash tree in your front yard or maintaining mature elms that shade your back deck, knowing these four foundational techniques gives you the confidence to care for your trees properly. We’ll walk you through exactly what each cut accomplishes, where to make it on the branch, and how to recognize when you’ve done it right, so you can build a long-term pruning plan that keeps your landscape healthy for years to come.
What You Need to Know Before Making Any Cut
Before you reach for the pruners, let’s talk about what’s happening inside your tree. Trees don’t heal cuts the way we heal a scraped knee. Instead, they compartmentalize wounds by growing new tissue around the injury, a process called callusing. The branch collar, that slightly swollen ring where a branch meets the trunk or parent branch, contains specialized cells that drive this healing. Cutting into the collar or leaving a stub disrupts this natural defense system, leaving your tree vulnerable to decay and disease.
Growth patterns matter too. Trees direct energy to terminal buds at branch tips, which suppresses growth lower down. When you remove that terminal bud with a cut, you’re essentially telling the tree to wake up dormant buds below. Understanding this helps you predict how your tree will respond to each cut.
Timing isn’t just about the calendar. Avoid pruning oaks and elms during the growing season when disease-carrying beetles are active. For most other species, dormant-season pruning minimizes stress and lets you see the branch structure clearly.
Here’s the relationship-building part: start by observing your trees through the seasons. Notice their growth patterns, where they leaf out first, which branches seem weak. After 21 years working with Edmonton homeowners, we’ve learned that the best tree care comes from this kind of attention.
As for DIY versus professional help, be honest about your comfort level. Small branches you can reach from the ground? That’s great learning territory. Anything requiring a ladder, near power lines, or over six inches in diameter calls for certified expertise.
Essential Tools and Safety Gear
Having the right tools makes all the difference between clean cuts that heal quickly and ragged wounds that invite disease. You don’t need a professional arborist’s entire arsenal, but investing in quality basics will serve you well for years.
Core Pruning Tools
- Hand pruners (bypass style): branches up to ¾ inch diameter, your everyday workhorse for small twigs and stems
- Loppers: branches ¾ to 1½ inches, longer handles give you leverage for thicker cuts
- Pruning saw: branches 1½ inches and larger, curved blade makes quick work of substantial limbs
- Pole pruner: overhead branches up to 1¼ inches, keeps you safely on the ground for high work
Choose bypass-style pruners over anvil types. Bypass blades make cleaner cuts that heal better, while anvil pruners crush tissue as they cut.
Safety Equipment You Shouldn’t Skip
Leather work gloves protect your hands from rough bark and sharp tools. Safety glasses are non-negotiable when you’re looking up at branches. For larger jobs involving chainsaws or climbing, you’re entering professional territory, that’s when to call us or another certified arborist with proper safety gear and insurance.
Tool Maintenance Matters
Sharp blades make clean cuts. Dull tools tear and crush branch tissue, creating larger wounds that struggle to heal. Wipe your blades with rubbing alcohol between cuts when removing diseased wood, and sharpen them at least once per season. A quick spray of oil after cleaning prevents rust during Edmonton’s humid summers.
Safety First: What Can Go Wrong
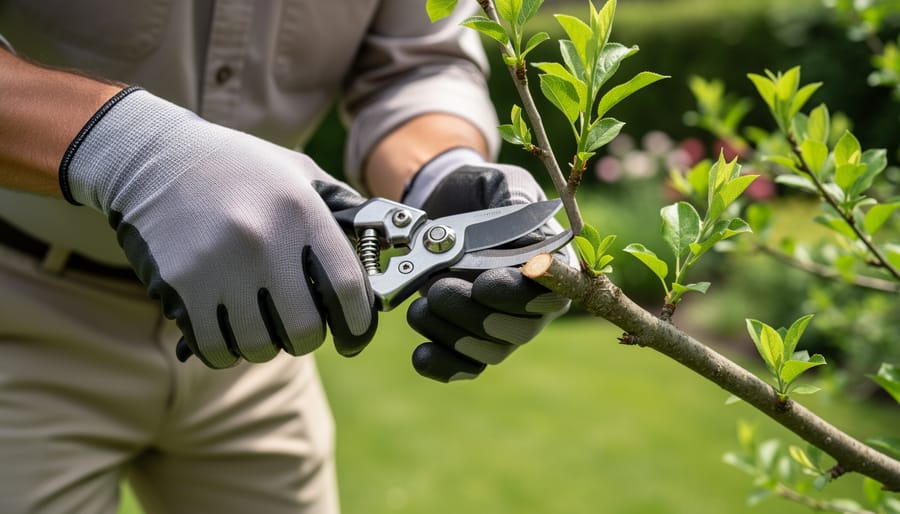
Before you make your first cut, let’s talk about what can go wrong, because a few minutes of planning can save you from serious injury or costly tree damage.
The biggest hazards are the ones above you. Overhead branches are heavier than they look, especially when waterlogged or snow-laden here in Edmonton. A falling branch can cause severe injury, and branches near power lines are downright dangerous. Even if a line looks insulated, assume it’s live.
Ladder work adds another layer of risk. Three-point contact, stable ground, and a spotter aren’t suggestions; they’re requirements. If you’re stretching, leaning, or working above shoulder height on a ladder, you’ve crossed into professional territory.
Common pruning mistakes don’t just endanger you, they harm your trees for years. Flush cuts (cutting too close to the trunk) remove the protective branch collar and invite decay. Stub cuts (leaving too much branch) create dead wood that won’t heal. Topping, hacking off large sections of canopy, is never acceptable and severely weakens trees.
Know your limits. If the branch is thick as your wrist or higher than you can comfortably reach from the ground, it’s time to call in help. At Mosai, we’ve spent 21 years keeping Edmonton homeowners and their trees safe, there’s no shame in reaching out when a job exceeds DIY scope.
The 4 Essential Pruning Cut Types
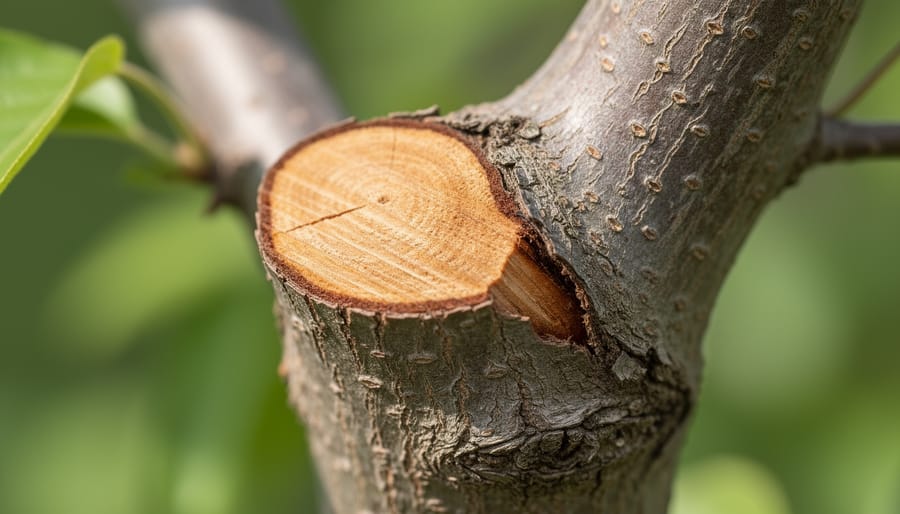
1. Thinning Cuts: Opening Up the Canopy
Thinning cuts are the most natural-looking pruning technique you can master. Instead of shortening a branch, you’re removing it completely at its point of origin, where it connects to the trunk or a larger parent branch. This mimics how trees naturally shed limbs and creates the cleanest healing response.
The secret to a proper thinning cut lies in finding the branch collar. Look closely at where your target branch meets the trunk or parent limb. You’ll notice a slight swelling or ridge of bark that forms a ring around the base, that’s the collar, and it’s packed with specialized cells that seal wounds. Your cut should preserve this collar while removing the branch flush to its outer edge. Cutting into the collar damages those healing cells; leaving a stub beyond it invites decay.
Here’s how to execute a clean thinning cut:
- Identify the branch collar by looking for the raised ring of bark tissue at the branch base
- Position your saw or pruners just outside the collar at a slight angle that follows the collar’s natural line
- For branches over an inch thick, make an undercut first about 6 inches from the collar to prevent bark tearing
- Make your second cut from the top, a bit farther out, to remove the branch weight
- Make your final cut just outside the collar, angling slightly away from the trunk
In Edmonton’s climate, thinning cuts offer specific advantages. Opening up your tree’s canopy reduces snow accumulation on branches during our heavy winters, preventing breakage. Better air circulation also helps foliage dry faster after rain, cutting down on fungal diseases that thrive in our cool, damp springs. Following proper tree pruning guidelines ensures these cuts promote long-term health rather than creating weak points that fail under stress.
2. Heading Cuts: Encouraging Bushier Growth
Heading cuts work by removing just part of a branch, you’re cutting it back to a bud or a smaller side branch rather than taking the whole thing off. This heading cuts encourage growth response triggers the tree to push out new shoots below your cut, creating bushier, denser foliage.
When is this useful? Heading cuts shine when you’re shaping young trees, maintaining formal hedges, or crafting topiaries, something we’ve done plenty of here at Mosai over 21 years of working with Edmonton gardens. If you want a fuller shrub or need to direct growth in a specific direction, heading cuts are your tool.
But here’s the catch: overusing them on mature trees creates problems. Too many heading cuts turn trees into tangled messes of weak, crowded shoots called water sprouts. They compromise the natural structure and often need constant correction. That’s why we reserve heading cuts for deliberate shaping work, not general tree maintenance.
The technique itself is straightforward. Find a healthy bud facing the direction you want new growth to go, usually outward from the center of the plant. Make your cut at a slight angle about a quarter inch above that bud, sloping away from it. Too close and you’ll damage the bud; too far and you’ll leave a stub that dies back and invites disease.
For hedges and topiaries, you’ll make many small heading cuts to maintain the shape. For young trees, use them sparingly and strategically to build a strong framework.
3. Reduction Cuts: Controlling Size While Maintaining Shape
Reduction cuts let you manage a tree’s size without butchering its shape, a skill that saves many Edmonton homeowners from the heartbreak of an over-pruned tree. When a branch is growing too long for its space (say, reaching toward your roof or blocking a sidewway), you don’t just hack it back anywhere. Instead, you shorten it to a side branch that’s substantial enough to take over as the new leader.
Here’s the rule that separates reduction cuts from random chopping: the lateral branch you’re cutting back to must be at least one-third the diameter of the section you’re removing. If the remaining branch is too thin, it won’t have the vascular capacity to support the tree’s energy flow, and you’ll end up with dieback or ugly water sprouts shooting up everywhere. Measure both diameters before you cut, if the lateral is pencil-thin and the main branch is wrist-thick, keep looking for a better target lower down.
This approach is completely different from topping, which is when someone just saws off the top of a tree at an arbitrary height. Topping leaves massive wounds, destroys the tree’s structure, and triggers weak, dangerous regrowth. Reduction cuts, done right, are safer pruning cuts that maintain the tree’s natural form while giving you the clearance you need. We use them constantly in tight Edmonton yards where trees outgrow their allotted space but still deserve to look like trees.
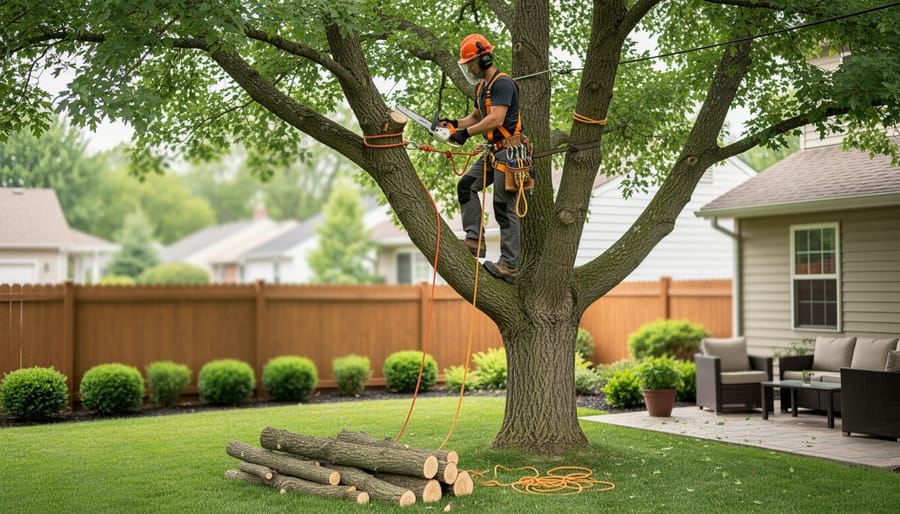
4. Cleaning Cuts: Removing Dead, Diseased, and Damaged Wood
Cleaning cuts are your year-round maintenance heroes. Unlike the other three types, you don’t need to wait for a specific season, whenever you spot dead, diseased, or damaged wood (the 3-Ds), it’s time to act.
Start by identifying problem branches. Dead wood feels brittle, lacks bark elasticity, and won’t have buds or leaves during growing season. Diseased branches often show discoloration, cankers, unusual growths, or oozing sap. Damaged wood includes anything cracked, split, or hanging after Edmonton’s brutal winter storms and heavy snow loads.
Here’s the critical part: make your cut back to healthy tissue. Look for the nearest healthy lateral branch or the branch collar at the trunk. You’ll know you’ve reached healthy wood when you see green cambium layer beneath the bark instead of brown or grey. Never leave stubs, they invite decay and pests.
Cleaning dead wood prevents disease from spreading to healthy parts of your tree and eliminates safety hazards. A broken branch dangling fifteen feet up won’t stay put forever, and you don’t want it crashing down during the next chinook wind.
For homeowners in Beaumont and Saint Albert, spring inspections after ice storms are essential. Walk your property, look up, and remove problem wood promptly. Small branches you can handle yourself; anything requiring a ladder or overhead work calls for professional help. Your trees, and your family’s safety, are worth it.
Knowing When Your Cut Worked: Signs of Healthy Healing
After you’ve made your cuts, the real test begins. Trees tell you whether you did it right through how they heal, and knowing what to look for helps you catch problems early or celebrate your success.
Within the first few weeks, you should see the wound begin to dry and harden. Over the following months, watch for a raised ring of tissue, called a callus, forming around the cut’s edges. This is the tree compartmentalizing the wound and sealing it off. Smaller cuts (under an inch) typically close completely within a year, while larger cuts may take several years to fully callus over. The branch should show no signs of dieback beyond the cut point, and new growth in spring should emerge normally from buds below where you pruned.
Here’s what to watch for:
- Healthy healing: Callus tissue forms around edges, bark stays intact, normal bud break in spring
- Warning signs: Bark peeling back from the cut, sap or ooze continuing beyond a few days, dieback spreading down the branch, excessive water sprouts shooting up around the wound
If you notice peeling bark, dark staining spreading from the cut, or a cluster of weak shoots erupting near your pruning site, the tree is stressed and struggling. These red flags often mean the cut was too close (damaging the branch collar), too far (leaving a stub), or made during the wrong season for that species. When you spot these problems, it’s time to contact professionals for Edmonton tree care guidance before the damage worsens.
Your Next Steps in Tree Care
Now that you understand the four essential pruning cuts, it’s time to put that knowledge into practice. Start small, grab your hand pruners and look for thin dead twigs or crossing branches on shrubs. These low-stakes cuts let you build confidence and muscle memory before tackling larger branches.
Set a reminder to walk your property each season, notebook in hand. Notice which branches get heavy with snow, where light doesn’t reach, and what’s rubbing or damaged. A simple tree journal, even just photos with dates, helps you track growth patterns and plan your pruning calendar around Edmonton’s climate.
We’re here to help you succeed. Whether you have questions about a specific cut, need a second opinion before making that big reduction, or want professional backup for anything beyond your comfort zone, the Mosai family has spent 21 years building relationships with homeowners throughout Edmonton, Beaumont, and Saint Albert. Your trees are an investment, and we’d love to be your partner in caring for them. Reach out anytime, we’re always happy to talk trees.
Common Pruning Questions Answered
Can I prune my trees during Edmonton winters?
Yes, dormant-season pruning (late fall through early spring) is actually ideal for most deciduous trees. The lack of leaves lets you see the branch structure clearly, and cuts heal well once spring growth begins. Just avoid pruning during extreme cold snaps below -25°C when wood becomes brittle.
How much of my tree can I safely remove at once?
The general rule is never remove more than 25% of a tree’s canopy in a single year. Removing too much stresses the tree and can trigger excessive water sprout growth. For mature trees, aim for 15-20% or less per pruning session.
Should I use wound dressing or sealant on pruning cuts?
No. Research shows that trees heal better when cuts are left exposed to air. Sealants can actually trap moisture and promote decay. Your tree’s natural compartmentalization process works best without interference, just make clean cuts and let nature handle the rest.
How often do trees need pruning?
It depends on the tree’s age and health. Young trees benefit from annual structural pruning to establish good form. Mature, healthy trees typically need attention every 3-5 years. However, you should remove dead, diseased, or damaged branches whenever you spot them.
What should I expect to pay for professional pruning?
Costs vary widely based on tree size, accessibility, and the work required. Small trees might run a few hundred dollars, while large mature trees can cost $1,000 or more. At Mosai, we provide free estimates so you know exactly what to expect, no surprises, just honest pricing from people who care about your property.
When should I call a professional instead of doing it myself?
Call a certified arborist for branches over 10 cm in diameter, anything near power lines, work requiring a ladder over 3 meters, or if you’re uncertain about the tree’s health. Our family has handled thousands of pruning jobs across Edmonton and surrounding areas, we’re always happy to assess your situation and give you honest advice, even if it’s just guidance for a DIY project.
These questions come up constantly in our conversations with homeowners, and they’re smart things to wonder about. Trees are long-term investments in your property, and getting the details right matters. If you’ve got a question we didn’t cover here, don’t hesitate to reach out. We’ve been doing this for over two decades, and there’s genuinely no such thing as a silly tree question.
Now that you understand the four fundamental pruning cuts, you’re equipped to make thoughtful decisions about your trees’ care. Whether you’re removing a damaged branch after an Edmonton winter storm or shaping a young tree in your Beaumont backyard, you know which cut to use and why it matters.
Proper pruning isn’t just maintenance, it’s an investment in your property’s beauty and your trees’ longevity. The trees you care for today will shade your grandchildren tomorrow, and that’s something worth doing right.
If you’re ever unsure about a cut or facing a larger pruning project, the Mosai family is here to help. With over 21 years of caring for trees across Edmonton, Saint Albert, and surrounding areas, we’ve built our reputation on relationships, not just transactions. We’d love to walk your property with you, answer your questions, and help you develop a long-term care plan for your trees. Reach out anytime, we’re always happy to chat about trees.