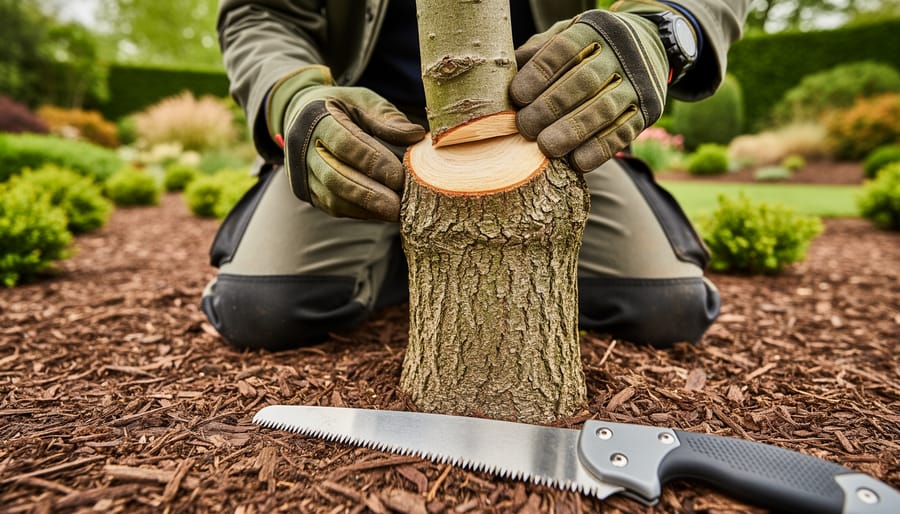
The 3-cut pruning method removes tree branches cleanly and safely by making three strategic cuts that prevent the bark from tearing down the trunk. This straightforward technique protects your tree’s health while keeping you safe during the pruning process, and you can master it with basic tools in about 10 minutes per branch.
When you’re standing beneath a branch that needs to go, your instinct might be to make one clean cut and let it fall. But that approach often ends in disaster. As the branch starts to drop, its weight rips a long strip of bark down the trunk, leaving an open wound that invites disease and pests. Trees can’t heal these vertical tears the way they seal horizontal cuts, which is why arborists rely on this proven three-step approach.
The method works because it removes weight before making your final cut. You’ll make an undercut first, then a top cut to drop most of the branch, and finally a precise collar cut that allows the tree to seal itself naturally. Each cut serves a specific purpose in managing the branch’s weight and protecting the bark.
You don’t need specialized equipment to get started. A sharp pruning saw, safety glasses, and work gloves will handle branches up to about four inches in diameter. Beyond that size, especially on branches higher than you can safely reach from the ground, it’s time to call in professionals who have the equipment and training to work at height safely.
Why the 3-Cut Method Matters for Your Trees
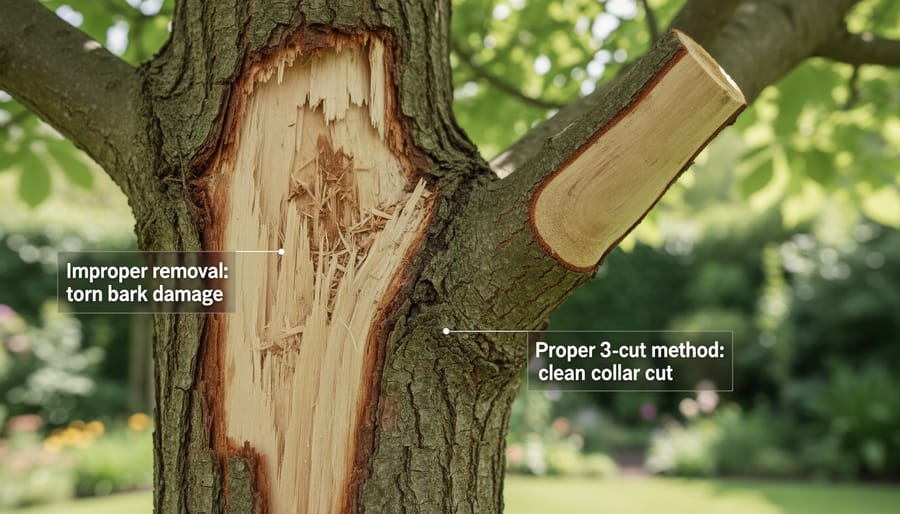
When a heavy branch falls under its own weight, it doesn’t drop cleanly. The weight acts like a lever, ripping downward and stripping bark along the trunk, sometimes several feet below where you intended to cut. That torn bark exposes fresh wood to pests, diseases, and rot, creating a wound the tree struggles to seal. The 3-cut method prevents this damage by removing the limb’s weight in controlled stages before making your final cut.
At the heart of this technique is the branch collar, a slightly raised ring of tissue where the branch meets the trunk. This collar contains specialized cells that seal wounds and block pathogens from reaching the tree’s interior. Cutting flush with the trunk removes this protective barrier, leaving the tree vulnerable. Following tree pruning guidelines that preserve the collar gives your tree the best chance to heal quickly and completely.
The long-term benefits extend beyond avoiding immediate damage. Trees pruned correctly live longer, resist disease better, and maintain their structural integrity as they grow. A single improper cut can compromise a tree’s health for years, leading to decay that spreads inward and weakens the entire structure. This simple three-step process protects your investment in your landscape and keeps mature trees healthy for decades.
What You’ll Need: Tools and Materials
Having the right tools on hand makes the 3-cut method straightforward and safe. You don’t need a shed full of equipment, but each item serves a specific purpose in protecting both you and the tree. Start with what you have, and if you’re buying new tools, invest in quality, sharp, well-maintained tools create cleaner cuts that heal faster and reduce the risk of accidents.
- Hand pruning saw or pole saw for branches up to 3-4 inches in diameter
- Bow saw for larger limbs that require more cutting power
- Safety glasses to protect your eyes from sawdust and debris
- Heavy-duty work gloves for grip and hand protection
- Hard hat if working beneath branches or in areas where limbs might fall
- Sturdy work boots with good traction
- Ladder (only if you can safely reach the branch from a stable position on the ground)
A sharp saw is your most important tool. Dull blades require excessive force, increasing the chance of slips and ragged cuts that stress the tree. Test your saw on a small branch first, it should cut smoothly without binding or requiring you to push hard.
Know your limits. If a branch is thicker than 4 inches, located near power lines, or requires you to work overhead or on a ladder, call a certified arborist. Mosai has worked with Edmonton families for over two decades, and we’ve seen too many homeowner injuries from jobs that looked manageable until they weren’t. Professional equipment and training make those situations routine rather than risky.
Safety First: Know Before You Cut
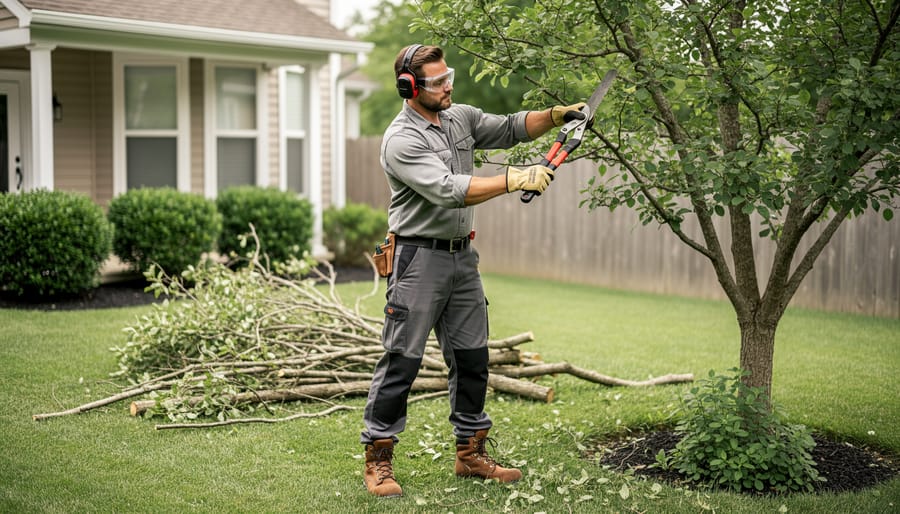
Before you pick up that saw, take a minute to assess the situation. Safe pruning starts with your eyes, not your hands. Walk around the tree and look up, are there power lines within 10 feet of the branch you plan to cut? If yes, stop immediately and call a professional. Even non-metallic tools can conduct electricity if they contact a live wire, and branches can swing unpredictably as they fall. Next, evaluate the limb itself: How thick is it? Which way will it fall when released? A branch heavier than you expect can pull you off balance or damage structures below. Always work from the ground using a pole saw when possible, rather than climbing a ladder where a shifting branch could knock you over.
Proper protective gear is non-negotiable. Wear safety glasses to shield your eyes from sawdust and debris, heavy-duty gloves to protect your hands from rough bark and sharp tools, and a hard hat if you’re working beneath other branches. Long sleeves and closed-toe boots add another layer of protection. Even a small branch can cause serious injury if it falls from height or springs back unexpectedly.
Your family’s safety matters more than any DIY project. If the branch is awkwardly angled, tangled with other limbs, or simply feels beyond your comfort level, that’s your cue to step back. Professional arborists have specialized equipment, training, and insurance for complex or hazardous work. At Mosai, we’d rather help you stay safe than see you take an unnecessary risk, pruning should protect your trees and your household, not put either in danger.
The 3-Cut Method: Step-by-Step Process
Cut #1: The Undercut
Start by locating a point 12 to 18 inches away from the trunk on the underside of the branch you’re removing. This distance is crucial, it gives you enough working room while keeping the cut far enough from the collar to protect the tree’s natural healing zone. Position your saw blade at this spot and begin cutting upward into the branch.
Your goal is to cut about one-third to halfway through the limb’s diameter, no more. This undercut acts as insurance against disaster. When a heavy branch falls under its own weight, it naturally wants to tear downward, ripping bark all the way down the trunk and creating a wound the tree can’t seal properly. By cutting upward first, you create a controlled breaking point that stops any tear before it reaches the trunk.
Keep your saw steady and let the blade do the work, forcing it will bind the saw or create a ragged cut. You’ll feel resistance increase as you approach the halfway point. That’s your signal to stop. This undercut is one of several types of pruning cuts that work together in sequence, and getting this first one right sets up the entire operation for success.
Cut #2: The Relief Cut
Move 2 to 3 inches farther out from your undercut, positioning yourself on the top side of the branch. This is where you’ll make your second cut, the one that actually removes the bulk of the limb.
Start your saw on the top surface and cut straight down through the branch. You’ll cut all the way through this time, allowing the limb to fall away cleanly. Because you made that undercut first, the branch won’t tear downward as it drops. Instead, it’ll break cleanly at your first cut and fall safely to the ground.
You’ll notice a stub remains attached to the trunk, don’t worry, that’s exactly what should happen. This stub is intentional and necessary. The relief cut removes the weight of the branch without putting any stress on the trunk or the critical branch collar area. Think of it as controlled demolition: you’re eliminating the heavy part first so you can make a precise final cut without any risk of tearing.
Let the limb fall naturally and clear your work area before moving to the final step. If the branch is heavy or awkward, have a helper guide it down or use a rope to control its descent. Never stand directly beneath where the limb will drop.
Cut #3: The Final Cut at the Branch Collar
With the stub removed and the weight gone, you’re ready for the most important cut of all: the clean-up cut at the branch collar. This is where precision matters most for your tree’s long-term health.
First, locate the branch collar, that slightly raised, wrinkled ridge where the branch tissue meets the trunk. It often looks like a swollen ring or bulge at the base of the stub. The collar contains specialized cells that compartmentalize wounds and trigger the tree’s natural healing response. Your goal is to preserve this protective tissue while removing the stub cleanly.
Position your saw just outside the branch collar, not flush against the trunk. Angle your cut slightly away from the trunk, following the natural line of the collar. This proper final cut should remove the stub without cutting into the collar itself or leaving a protruding stub.
Why does this matter so much? Cutting flush removes the collar and exposes trunk tissue, creating a larger wound the tree struggles to seal. Leaving too much stub invites decay to creep toward the trunk. When you cut just outside the collar, you give the tree the best chance to wall off the wound naturally and grow new protective tissue over the cut surface.
Don’t worry if the cut looks raw initially. Resist the urge to apply wound dressing or paint, modern arboriculture research shows trees heal faster when left alone. Within weeks, you’ll notice the edges beginning to callus as the tree seals itself. That’s exactly what should happen.
How to Identify a Proper Cut: Verification and Next Steps
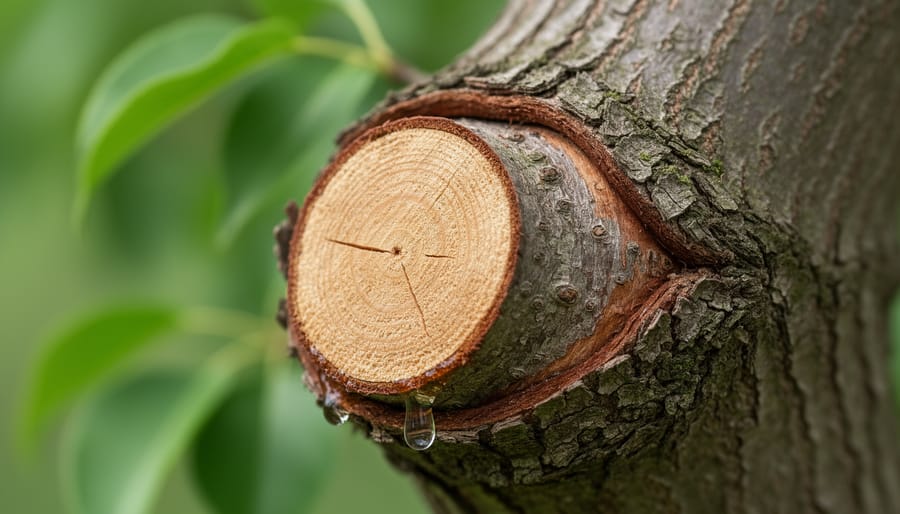
Once you’ve finished all three cuts, take a moment to inspect your work. A proper cut should look clean and smooth, no torn bark, no ragged edges, and no splintered wood. Run your hand near (not on) the cut surface; it should feel relatively even, not rough or shredded.
Next, check the position. The cut should sit just outside the branch collar, that slightly raised ring where the branch met the trunk. You shouldn’t see a protruding stub, but you also shouldn’t have cut flush into the trunk tissue. A slight angle that follows the natural line of the collar is ideal, this helps water run off rather than pool in the wound.
Over the next few weeks and months, watch for signs of healthy healing. The exposed wood will darken and dry out, and a callus layer (new bark tissue) will gradually form around the edges of the cut. This process can take several months to a full year depending on tree species and limb size. That’s normal and healthy.
Resist the urge to apply wound dressing, paint, or sealer. Modern arboriculture research shows these products can actually trap moisture and slow healing. Trees evolved to seal their own wounds naturally, and they do it best when left alone.
Plan your next pruning session for late winter, before spring growth begins. Regular maintenance, removing dead wood, thinning crowded branches, and shaping growth, builds long-term tree resilience. Consistent care means fewer large cuts later, and healthier trees for decades to come.
Common Questions About the 3-Cut Pruning Method
Can I use the 3-cut method on branches of any size?
The technique works for any branch that might tear the bark when falling, but homeowners should stick to limbs up to 3-4 inches in diameter. Larger branches require professional equipment, experience reading weight distribution, and often aerial work that puts you at serious risk.
What time of year should I prune using this method?
Late winter is typically ideal for most trees since they’re dormant and wounds seal quickly once spring growth starts. However, timing varies by species, oaks shouldn’t be pruned during growing season due to oak wilt risk, while maples can bleed sap heavily in early spring.
Do I need to apply wound dressing or sealer after cutting?
No. Modern arboriculture research shows that trees compartmentalize wounds most effectively when left untreated, sealants can actually trap moisture and encourage decay rather than prevent it.
What if I can’t safely reach the branch from the ground?
Call a certified arborist. Overhead cutting from a ladder dramatically increases injury risk, and branches near power lines or over structures require professional assessment and equipment.
These questions come up repeatedly because homeowners want to do the job right without creating bigger problems. The size limit matters more than most people realize, a 5-inch branch doesn’t sound much larger than a 4-inch one, but the weight difference is substantial, and controlling the fall becomes exponentially harder. You’ll also want to consider your tree’s growth pattern and your property’s specific needs when timing your cuts.
If you’re uncertain about any aspect of a pruning job, whether it’s the branch angle, proximity to structures, or just a nagging feeling that something’s off, that uncertainty is your signal to pause. Professional arborists have seen every scenario, carry proper insurance, and can often complete in an hour what might take you all afternoon while standing on a wobbly ladder.
Mastering the 3-cut pruning method is one of the most valuable skills you can develop as a tree owner. This simple technique protects your trees from serious damage, promotes healthy healing, and preserves the long-term value of your landscape. By taking the time to make clean, strategic cuts, you’re investing in your trees’ future and preventing costly problems down the road.
Start by practicing on smaller branches to build your confidence and refine your technique. As you become more comfortable, you’ll recognize when a pruning job is within your skill range and when it’s time to bring in professional help. There’s no shame in calling an expert for larger limbs, awkward angles, or anything that feels unsafe.
For over 21 years, Mosai Gardening Services has helped Edmonton homeowners, along with families in Beaumont and Saint Albert, maintain healthy, beautiful trees through every season. As a family-owned business, we’re committed to building lasting relationships with our community, not just completing one-time jobs. Whether you need hands-on guidance, professional pruning for larger projects, or simply want to talk through your tree care questions, we’re here to help your trees thrive for generations to come.